")


")


Open- source braille embosser | HackSpace #78
In the latest issue of HackSpace magazine, out now, Andrew Gregory finds out how Stéphane Godin made an open-source braille embosser.

Imagined in 1829 by Louis Braille, Braille is a tactile alphabet for blind and partially sighted people. Made of a grid of six dots, each Braille cell corresponds to a letter or an escape code to specify a capital, number, or punctuation mark. As each cell consists of six dots, there are 64 combinations available. Due to the limited number of combinations, each country has adopted its own Braille standard. The usage of computers and information technology shows the need for a better standard with more combinations. Since the start of the 21st century, we also have eight-dot Braille standards. At this time, eight-dot standards are used only on numerical devices, such as Braille displays.
Making aBraille dot

When creating Braille documents, a simple method is to use a metal needle and an elastic material, such as a mouse pad, placed behind the paper. You create the Braille dots by pressing the needle gently onto the paper, causing it to deform. However, the dot will have a blurred edge. We started this project by using an anvil, and found that using a 2 mm hole in a flat 3D-printed part produced better results. This method created a dot with a nice relief over the paper and a sharp edge. Unfortunately, the 3D-printed parts proved to be unreliable, as the material fell apart after a few dots. After testing, we found that the anvil must be made of metal. We also found that the hex hole of an M3 grub screw is perfect for our needs. As a result, all of our designs are now made with a 30 mm grub screw. The hex hole serves as the anvil shape, and we glue and lock a hex nut onto the other end to adjust the depth of the Braille dot.
Planned design

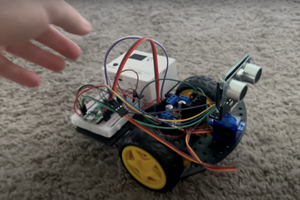
Our plan was to create a standard 2D board with a Braille needle on a carriage, building on previous tests conducted on modified CNC or 3D printers. Since Braille dots are always at the same depth, we don’t require precise control of the tool depth. Therefore, a simple solenoid is sufficient to manage the up and down positions. A solenoid is much faster than a stepper motor or servo. Just think about a standard CNC with a Braille needle on a solenoid as a tool. As we’ve seen, a good Braille dot requires a needle and an anvil. Therefore, our Braille tool consists of two parts. The paper is placed between two carriages, with the bottom one using a solenoid to punch dots while the other acts as the anvil. The paper is fed with stepper-controlled rollers to control the position.
Paper feed
When handling the paper, the sheet must be securely held between the two rollers. The bottom roller is driven by the Y motor, while the top roller applies the required pressure. If the sheet slips on the rollers, it can lead to inaccurate printing or even cause a paper jam.
We created our first prototype using three rollers and paper pressers. The pressers were all situated on the same 8 mm linear rod axis, with two springs at each end to ensure good pressure on the paper. Although this system worked adequately, it was difficult to build and adjust. So, we decided to experiment with three independent pressers and relied on the plastic’s elasticity to maintain the pressure. However, the paper feeding system was still tricky to adjust and was not very reliable.

We then decided to try a simpler system using only two rollers, as it is easier to align two points. We had what we thought was a good design that was simple to build and reliable. We made a few prototypes using this design and had some success. However, with only two rollers, you can’t use materials like aluminium cans.
We then attempted to upgrade the paper presser by adding springs, one for each presser. We found the GT2 tensioner spring was both affordable and easy to find. So, we redesigned the presser with two plastic parts articulated around an M3 screw, using a GT2 tensioner as a spring. Success! This new presser is more flexible and applies firmer pressure on the paper, resulting in a better paper roll that securely holds the sheets of paper.
Detecting the edge

On our board, we need a reference to define an absolute X and Y position on the paper. On the X axis, there is a standard end switch that detects the minimum position of the bottom carriage and defines it as the 0 position for X. The Y axis runs along the paper sheet, so we must detect the start of the paper. Initially, we used a standard end switch with the end switch lever in contact with the paper to detect the top edge of the sheet, defining the top edge as the 0 position for Y. It worked fine, but it was difficult to set up – the paper jammed if it was too close to the end switch and was often undetected if too far. To improve the design, we used a 3D-printed lever to offset the end switch and a hex screw for fine-tuning the detection position.
Paper path
Another important aspect of the paper feeding process is the path that the material takes within the device. It’s a delicate process, and even the slightest obstacle can cause a paper jam. Initially, we used a plywood or PMMA plate with a 10 mm path for the Braille needle in the centre. However, this setup often resulted in paper jams. As the paper travelled downwards, sometimes one of its corners got caught on the edge of the needle path, causing a jam. To overcome this problem, we experimented with various 3D-printed designs to keep the paper securely on the tray. However, these designs required post-processing, and we found that it’s better to let a piece of paper go its own way if it’s sticking in the printer. We can lower the tray on the output side, just after the needle’s path, and it works incredibly well! The lesson we learned is to never force a piece of paper and instead let it travel through freely.

Solenoid alignment
One recurring issue we encountered was the Braille needle would fail to lower when the solenoid was activated and deactivated, resulting in paper jams or missing Braille dots. The bottom carriage proved the most challenging part to create. The solenoid axis needs to move freely, so we designed a 3D-printed part that acted as a guide for the needle. Though everything seemed to work fine when we tested the Braille needle manually, we found that the needle would often lock in the top position when we used the electromagnet with power. As we were using a cheap electromagnet, we noticed that the position of tapped holes on the side of the solenoid was not accurately aligned with the solenoid axis. In some solenoids, there is a slight angle between the axis and the anvil. This can cause a lateral force on the axis when the needle enters the anvil, which is enough to lock the solenoid in the activated position. We found that the best solution was to make oblong holes for the solenoid fixing screws – this allowed us to finely adjust the solenoid axis with the anvil.
A word about software
We now have a device that enables us to move a Braille needle along the X axis using a stepper motor, and we can move the paper along the Y axis using another stepper motor. This is perfect for a 3D printer controller board with Marlin firmware. We modified the Marlin firmware to slightly adjust the Y homing. If the end switch is on, detecting the paper, we move the paper backward until the switch is off. If the end switch is off, we move the paper forward until the switch is on. This special homing feature allows the user to easily load the paper into the rollers, and the 0 Y position is automatically set at the top edge of the sheet.
The power output designed for the heatbed is used for the solenoid control. Initially, we used the G-code M3 command to enable and disable the solenoid. This command is typically used for laser control, where M3 S1 activates the laser, and M3 S0 deactivates it. We used the command in the same way to control the solenoid. However, solenoids are different from lasers; you can’t activate them for too long. Without a cooling system, you must respect an activation/deactivation ratio, which was low with the cheap, powerful solenoid that we used. Initially, we relied on the activation/deactivation command in the G-code file, but users reported burning the solenoid, usually by leaving the software without safeguards. To address this, we made another change in the Marlin firmware. The M3 S1 command still activates the solenoid but only for 50 ms. This is long enough to emboss a dot and ensures that the solenoid is never activated longer than 50 ms.
We now have a G-code-programmable device to emboss Braille dots anywhere on a sheet of paper. To emboss a document in Braille, you can use AccessBrailleRAP. This software translates text into Braille characters, calculates the position of Braille dots on the paper, and then sends the G-code sequence to the embosser. However, you still need to translate the text into Braille. As we discussed earlier, there are different standards for Braille across the world, including variations between the UK and the US. As French lecturers, we started with basic software to translate text into Braille. However, we realised that there were many complex nuances involved in the process. For instance, marking a number is not the same as marking a group of numbers, and marking a capital letter is not the same as marking an entire word in capital letters. These details require careful attention to ensure an accurate translation. While searching online for an open-source Braille transcription library, we found Liblouis. It is a grammar interpreter that enables you to produce Braille translations using text files, removing the need to write code for a Braille translator. As Liblouis is open-source and publicly available, many contributors have provided data files for their own languages. Currently, Liblouis can translate Braille into more than 200 Braille standards. All the major languages of the world are supported, including and some regional ones. So, we stopped trying to code Braille transcription, used Liblouis, and focussed on providing accessible software to use BrailleRAP.