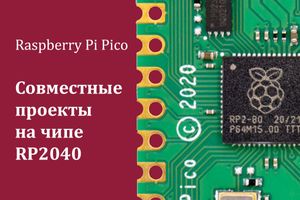
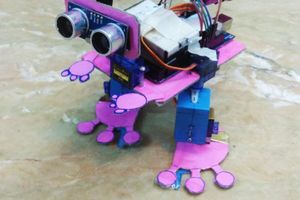
Raspberry Pi Pico W навчили цю машину обходити об'єкти

Створення робота-автомобіля, який уникає перешкод, може здатися однією з найскладніших збірок Raspberry Pi, з якими Ви можете працювати, з усіма двигунами, драйверами та датчиками, які вам потрібні. Але Карам Хаддад у своєму семихвилинному відео збірки ( Karam’s build video ) робить це так, що воно виглядає дуже легко.

Як це працює?

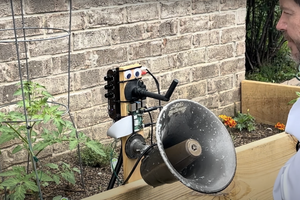
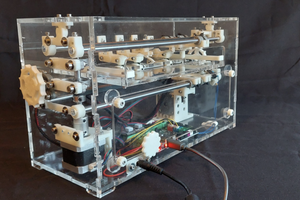
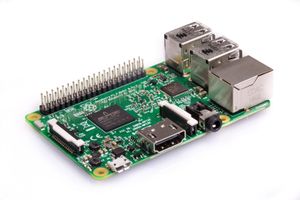
Мозком робота-автомобіля є Raspberry Pi Pico W, обраний саме через те, що він достатньо малий, щоб акуратно сховатися всередині шасі, але має необхідну обчислювальну потужність для обробки логічних задач керування, необхідних для навігації. Ультразвуковий датчик, встановлений на серводвигуні, дозволяє автомобілю вимірювати навколишнє середовище, знімаючи показання відстані в усіх напрямках. «Ця стіна знаходиться на відстані семи метрів, тому я повинен припинити рух до неї приблизно через 6,9 метра», — так казала сама собі машина. Робот навчений завжди віддавати перевагу руху вперед, коли шлях вільний, і оцінювати альтернативні шляхи лише тоді, коли виявлено об’єкт.

The image displays a graphical presentation of the main parts used in a DIY robotic vehicle. It is divided into sections, each highlighting a different component with an image and a label: MEGO Power Supply: Shown at the top left, this is a portable power supply unit with various input and output options. L298N Motor Driver: Located next to the power supply, this is a red circuit board used for controlling the motors of the robot. 2 DC Motors: Illustrated on the top right, these are yellow-cased motors that power the movement of the robot. Servo Motor: Below the power supply, there’s a blue servo motor, typically used for precise control of angular or linear position. Ultrasonic Sensor: Next to the servo motor, this sensor (blue with two circular elements) is used for distance measuring. Pico W: At the bottom right, this small green circuit board is a microcontroller unit with wireless capabilities. Tires: Accompanying the DC motors, shown at the very right, are wheels with yellow hubs and black tires, which facilitate the robot's mobility. The layout is clear and educational, providing a quick overview of the essential components involved in building a basic robotic vehicle.
Всі фотографії є скріншотами з відео Карама ( Karam’s build video )

Регульоване джерело живлення постійного струму живить робота. Водій регулює напрямок і швидкість двигунів постійного струму, прикріплених до кожного колеса автомобіля.

The image shows a close-up of a DIY robotic vehicle on a carpeted floor. A hand is reaching towards the robot, possibly for adjustment or demonstration. The robot features a variety of components: Chassis: The base of the robot has large yellow wheels, providing stability and mobility. MEGO Power Supply: Mounted on the robot, this white box supplies power and displays a digital readout (not visible in this view). Ultrasonic Sensor: Mounted on a bracket at the front of the robot, this sensor has two cylindrical elements for distance measurement. Electronic Components: There are several boards and a mass of wires visible, indicating a complex setup likely involving a microcontroller and motor drivers. Servo Motor: Visible as part of the steering or operational mechanism. This setup seems to be part of a robotics project or hobbyist activity, demonstrating the integration of mechanical and electronic engineering components. The context suggests testing or development, typically seen in educational or DIY technology environments.

Фізичне шасі автомобіля, включно з індивідуальними кріпленнями для двигунів і датчиків, було надруковано на 3D та склеєно гарячим способом.

The image shows a close-up view of someone working on a DIY robotic vehicle at a desk. In their hand, they hold an ultrasonic sensor module, which consists of two round sensors on a blue circuit board. The workspace features several components: Robot Chassis: The base of the robot includes wheels and various mounted electronic parts. Ultrasonic Sensor: Currently being held, this sensor is used for distance measurement. Power Supply: To the left, a portable power supply labeled "MEGO" displays a voltage reading of 7.41 volts. Microcontroller Board: A green circuit board, possibly a Raspberry Pi or similar, with other connected electronic components and wires. Servo Motor: Visible as part of the robot's hardware, potentially used for steering or other movements. In the background, the desk is equipped with a mechanical keyboard and a modern computer mouse, suggesting this setting is a well-used personal or work area for technological projects.
Підключаємо все

Оу-оу, упс та вдосконалення

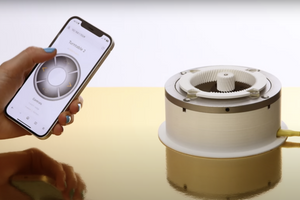
Караму довелося зробити декілька певних махінацій щоб усунути падіння напруги під час тестування, через що двигуни залишилися без достатньої потужності, але після цього робот був готовий до дорожніх випробувань навколо імпровізованої смуги перешкод. Виробник хотів би вивчити можливість інтеграції підключення до смартфону, що дозволить вам вручну керувати роботом.

The image features a DIY robotic vehicle on a carpeted floor, facing a pair of worn cowboy boots. The robot has wheels, wires, and a couple of electronic modules, including one with a digital display showing "609". Above the scene, a strip of LED lights is mounted along the baseboard, illuminating the area with a soft glow. The setting appears to be a home environment, suggested by the domestic-looking carpet and wall base. The juxtaposition of the traditional cowboy boots with the modern, homemade robot creates an interesting contrast between rustic and technological elements.
Оцінювання місцевості

Переходьте на GitHub аби отримати повний код, і поставьте відео Карама build video лайк на Ютубі.